Deploying Traefik to AKS with Let's Encrypt and Cloudflare Support
Traefik in AKS with Let's Encrypt and Cloudflare integration
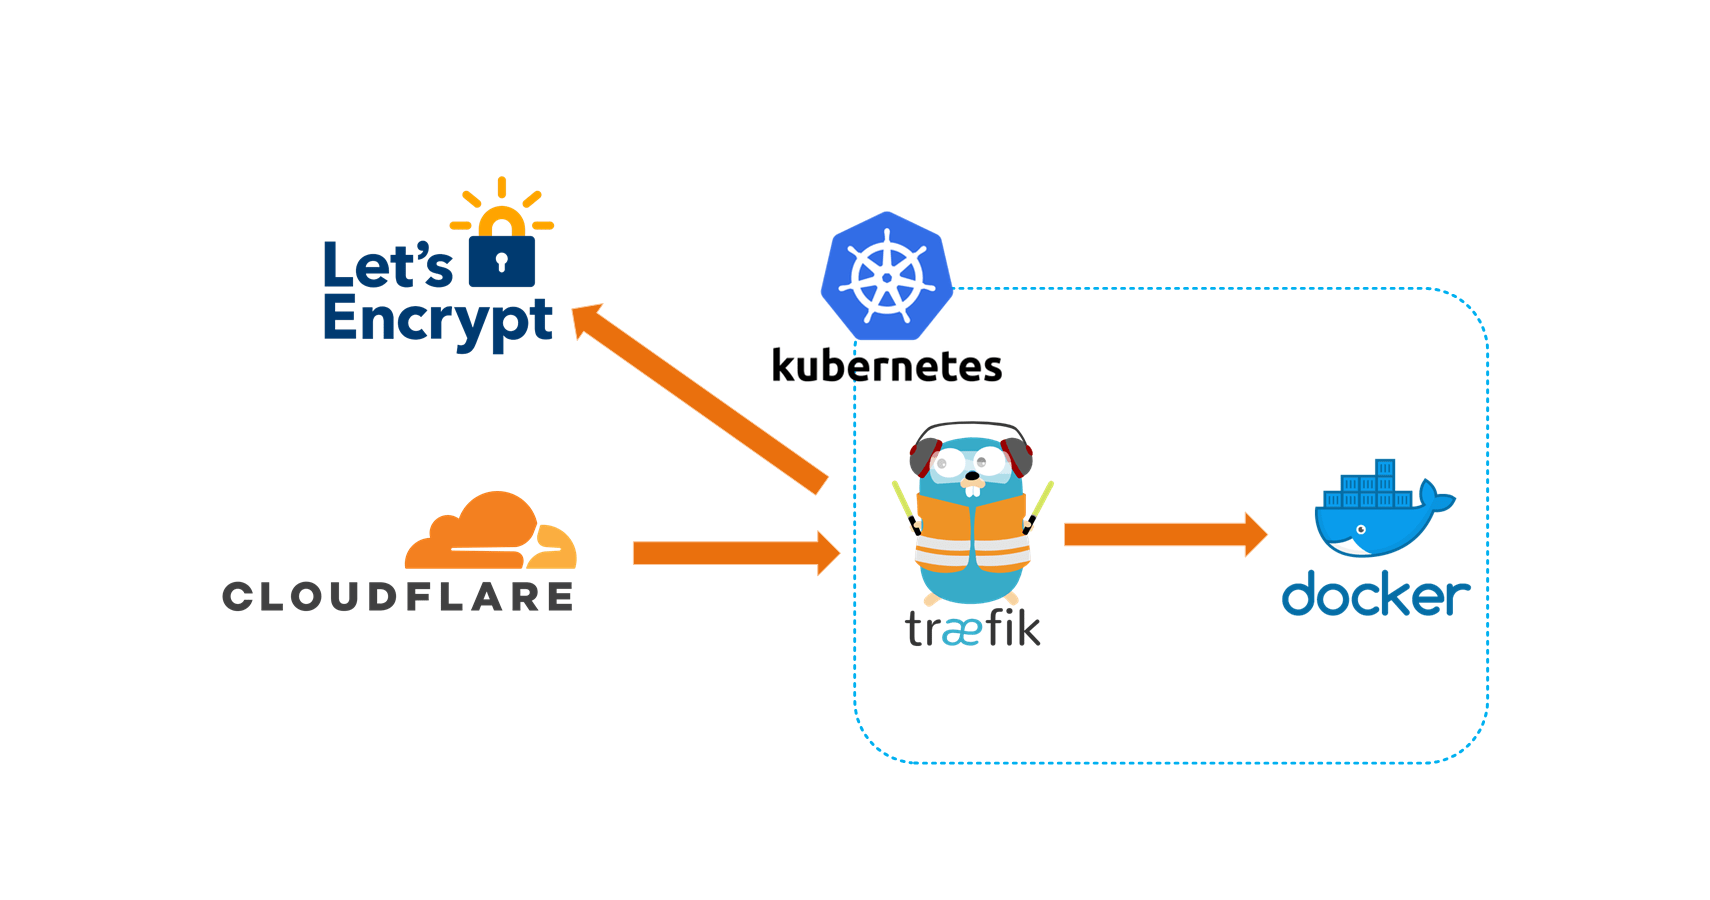
Recently I started using Azure Kubernetes Service (AKS) for running docker containers, jumping into the world of Kubernetes was a lot to learn but coupled with getting the environment setup, it was definitely a challenge. This article will walk you through the same path I followed to getting setup with a docker container running in AKS with Traefik and SSL.
What’s an ingress controller and why use Traefik?
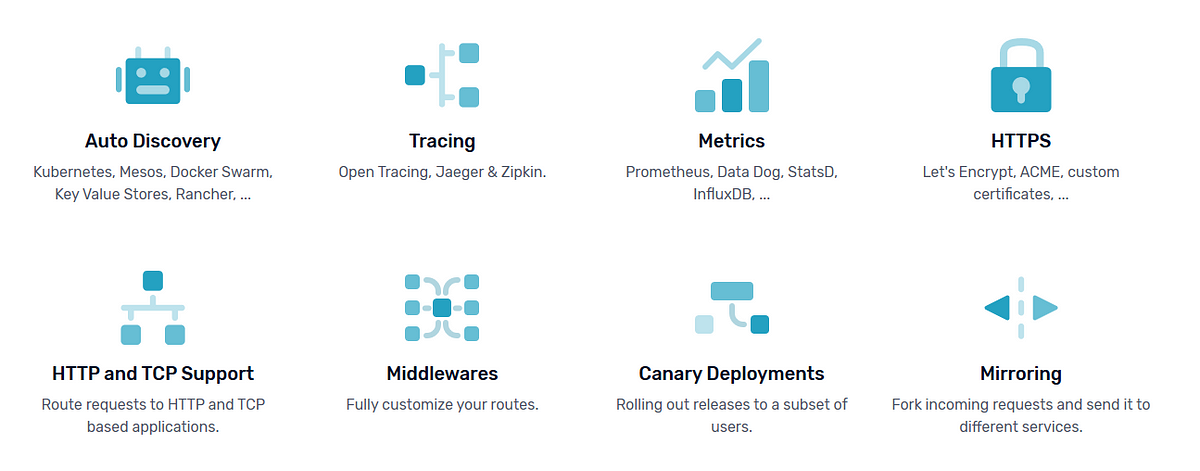
In simple terms, an ingress controller is a resource in Kubernetes that allows traffic to enter a cluster and get to one of your exposed services. There are quite a few different ingress controllers developed for Kubernetes, my personal favorite is Traefik as its one of the most fully featured ingress controllers available with advanced routing and load balancing and built-in support for Let’s Encrypt, to name a few of the features.
Setting up Traefik in AKS
Let’s get down to business, we’re going to walk-through the full deployment process, but if you just want the configuration files, they can be found on my GitHub here. Here’s what you’ll need for this:
- Azure Subscription
- Cloudflare account with your domain name configured
1. Spinning up an AKS instance
Most of the commands we’re going to execute will be using the Azure CLI, instructions for installing it can be found here. Once installed you should be able to execute az --version in Windows PowerShell to check that everything is correctly installed.
Then, still in PowerShell execute the following script:
<### -------------------------------------------------------- ###
                        Create AKS Cluster
### --------------------------------------------------------- ###>


# Define variables
$location = "westeurope"
$aksClusterName = "akswalkthrough"
$aksResourceGroup = "aksgroup"
$nodeCount = 1 #development setup
$nodeSize = "Standard_D1_V2"

# Login to Azure
az login

# Create Azure resource group
az group create --name $aksResourceGroup --location $location

# Create AKS Cluster
az aks create --resource-group $aksResourceGroup --name $aksClusterName --node-count $nodeCount --node-vm-size $nodeSize --enable-addons monitoring --generate-ssh-keysThis will bring up an interactive prompt to sign into Azure and then spin up an AKS cluster using the defined variables.
Once the cluster is provisioned, we can connect to it using the Kubernetes CLI, which can be installed using az aks install-cli . Then, we can configure the Kubernetes CLI to connect to our cluster using the command:
az aks get-credentials --resource-group aksgroup --name akswalkthrough
To check that everything has installed correctly, run kubectl get nodes . If this responds successfully then the deployment has succeeded.
2. Setting up Traefik and Let’s Encrypt
Since our domain is managed using Cloudflare, we’re going to need some credentials so that Let’s Encrypt can perform the DNS challenge successfully. A DNS challenge is required if you want to issue wildcard certificates.
Login to your Cloudflare account and get your the global account key. Which can be found by going to My Profile -> API Tokens -> Global API Key -> View.
NB. It’s possible to do this using a DNS Zone Key instead, which would follow the principle of least privilege.
Now since this is supposed to be a secret we don’t want this to live in our Traefik configuration files so we’ll store it in the cluster using a secret. Using kubectl, execute:
kubectl create secret generic cloudflare-credentials --from-literal=globalApiKey=<YOUR API KEY>
Next, we can install Traefik into our Kubernetes cluster. There are quite a few ways to do this, which can be found here. Personally, I found using the Custom Resource Definition (CRD) for Kubernetes to be the easiest. This involves three steps:
a) Install the Traefik Custom Resource Definition which defines a custom IngressRoute type
# All resources definition must be declared
apiVersion: apiextensions.k8s.io/v1beta1
kind: CustomResourceDefinition
metadata:
  name: ingressroutes.traefik.containo.us

spec:
  group: traefik.containo.us
  version: v1alpha1
  names:
    kind: IngressRoute
    plural: ingressroutes
    singular: ingressroute
  scope: Namespaced

---
apiVersion: apiextensions.k8s.io/v1beta1
kind: CustomResourceDefinition
metadata:
  name: middlewares.traefik.containo.us

spec:
  group: traefik.containo.us
  version: v1alpha1
  names:
    kind: Middleware
    plural: middlewares
    singular: middleware
  scope: Namespaced

---
apiVersion: apiextensions.k8s.io/v1beta1
kind: CustomResourceDefinition
metadata:
  name: ingressroutetcps.traefik.containo.us

spec:
  group: traefik.containo.us
  version: v1alpha1
  names:
    kind: IngressRouteTCP
    plural: ingressroutetcps
    singular: ingressroutetcp
  scope: Namespaced

---
apiVersion: apiextensions.k8s.io/v1beta1
kind: CustomResourceDefinition
metadata:
  name: tlsoptions.traefik.containo.us

spec:
  group: traefik.containo.us
  version: v1alpha1
  names:
    kind: TLSOption
    plural: tlsoptions
    singular: tlsoption
  scope: Namespaced

---
apiVersion: apiextensions.k8s.io/v1beta1
kind: CustomResourceDefinition
metadata:
  name: traefikservices.traefik.containo.us

spec:
  group: traefik.containo.us
  version: v1alpha1
  names:
    kind: TraefikService
    plural: traefikservices
    singular: traefikservice
  scope: Namespaced
b) Install a ClusterRole and ClusterRoleBinding. These define permissions and access rights within the cluster.
kind: ClusterRole
apiVersion: rbac.authorization.k8s.io/v1beta1
metadata:
  name: traefik-ingress-controller

rules:
  - apiGroups:
      - ""
    resources:
      - services
      - endpoints
      - secrets
    verbs:
      - get
      - list
      - watch
  - apiGroups:
      - extensions
    resources:
      - ingresses
    verbs:
      - get
      - list
      - watch
  - apiGroups:
      - extensions
    resources:
      - ingresses/status
    verbs:
      - update
  - apiGroups:
      - traefik.containo.us
    resources:
      - middlewares
      - ingressroutes
      - traefikservices
      - ingressroutetcps
      - tlsoptions
    verbs:
      - get
      - list
      - watch

---
kind: ClusterRoleBinding
apiVersion: rbac.authorization.k8s.io/v1beta1
metadata:
  name: traefik-ingress-controller

roleRef:
  apiGroup: rbac.authorization.k8s.io
  kind: ClusterRole
  name: traefik-ingress-controller
subjects:
  - kind: ServiceAccount
    name: traefik-ingress-controller
    namespace: default
c) Finally, we install Traefik into the cluster using a Kubernetes Deployment .
apiVersion: v1
kind: ServiceAccount
metadata:
  name: traefik-ingress-controller

---
kind: Deployment
apiVersion: extensions/v1beta1
metadata:
  name: traefik
  labels:
    app: traefik

spec:
  replicas: 1
  selector:
    matchLabels:
      app: traefik
  template:
    metadata:
      labels:
        app: traefik
    spec:
      serviceAccountName: traefik-ingress-controller
      containers:
        - name: traefik
          image: traefik:v2.1
          args:
            - --log.level=DEBUG
            - --api
            - --api.insecure
            - --entrypoints.web.address=:80
            - --entryPoints.websecure.Address=:443
            - --certificatesResolvers.le.acme.dnsChallenge=true
            - --certificatesResolvers.le.acme.dnsChallenge.provider=cloudflare
            - --certificatesresolvers.le.acme.email=YOUREMAIL@DOMAIN.co.za
            - --certificatesresolvers.le.acme.storage=acme.json
            # Please note that this is the staging Let's Encrypt server.
            # Once you get things working, you should remove that whole line altogether.
            - --certificatesresolvers.le.acme.caserver=https://acme-staging-v02.api.letsencrypt.org/directory
            - --providers.kubernetescrd # set kubernetes custom resource defintion as the provider
          ports:
            - name: web
              containerPort: 80
            - name: websecure
              containerPort: 443
            - name: admin
              containerPort: 8080
          env:
            - name: CF_API_EMAIL
              value: YOUR_CLOUDFLARE_EMAIL@DOMAIN.com
            - name: CF_API_KEY
              valueFrom:
                secretKeyRef:
                  name: cloudflare-credentials
                  key: globalApiKey
---
apiVersion: v1
kind: Service
metadata:
  name: traefik
spec:
  type: LoadBalancer
  selector:
    app: traefik
  ports:
    - protocol: TCP
      port: 80
      name: web
      targetPort: 80
    - protocol: TCP
      port: 8080
      name: admin
      targetPort: 8080
    - protocol: TCP
      port: 443
      name: websecure
      targetPort: 443
The most important things to note here are:
- The container name image: traefik:v2.1 this defines the Traefik container we’ll be using. You’ll want to update this to the latest version as new releases are pushed to the their docker hub account .
- The certificatesResolvers.le.* define the Let’s Encrypt configuration. You’ll want to update the email to get notifications and when you’re ready for production comment out the caserver argument.
- The environment variable CF_API_EMAIL which you need to set to your CloudFlare login email. If you’d like to keep this out of source control you can set it as a docker secret as we did with the Global API Key.
The easiest way to apply these configuration files is to save them into a folder and then run kubectl apply -f ./<Folder Name>so that all configuration files are applied.
3. Testing Traefik and Let’s Encrypt
Now we’ll test our Traefik deployment by first visiting the Traefik dashboard to see that everything has been setup correctly. In your PowerShell window that has been configured with your Kubernetes cluster context, execute:
kubectl get services
This will list out all the services registered in the cluster. Services are basically resources that are used for networking in the context of Kubernetes. You should see something like this:

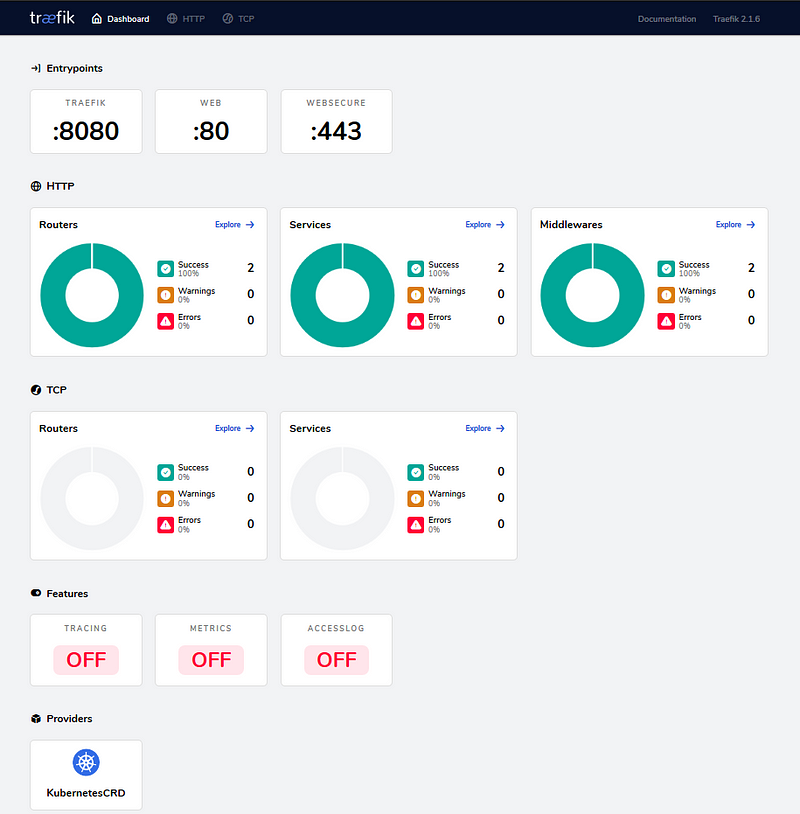
The traefik entry should have an External-IP, if this still says <pending> then Traefik is still busy configuring itself. Once you have an external IP, navigate to External-IP:8080 which is the Traefik dashboard. You should see a basic dashboard like this:
4. CloudFlare Setup
As a last step, log into CloudFlare and update the A record for your domain, to point to the Traefik External IP. This will allow traffic to get to your Kubernetes cluster.

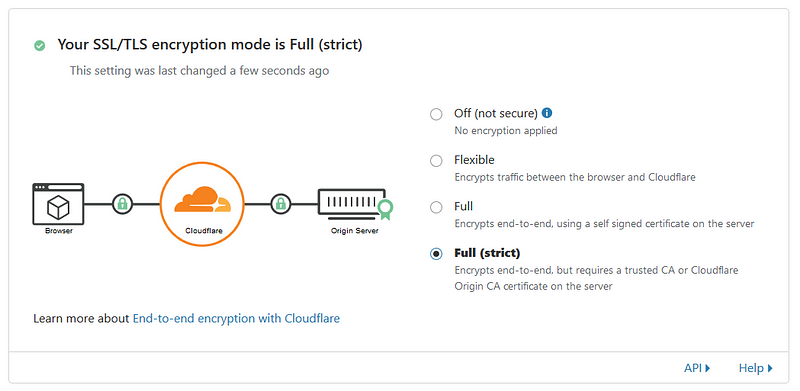
If you tried to hit your container you would probably end up getting the dreaded 404 response, in order to avoid this we need to configure the SSL settings in CloudFlare. To do this, set SSL mode to Full (Strict)
NB. This will only work when you’re using the Let’s Encrypt production servers. If you’re still developing and using the staging servers, leave the SSL mode on Flexible and set the Proxy Status of the A record to “DNS Only”.
Amazing! Now we actually have Traefik configured, but what the heck do we do with this, how do we use the Let’s Encrypt certificate and how do we get traffic to our containers?
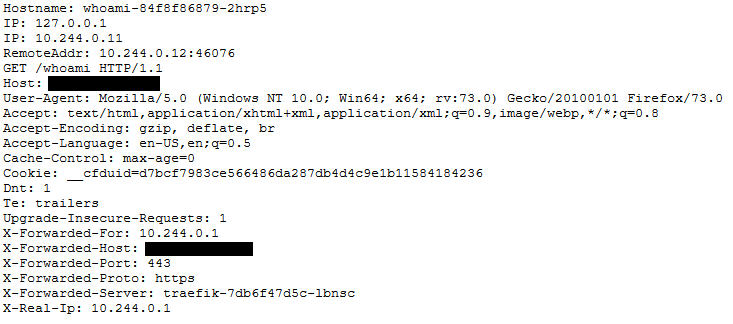
To test this configuration we’ll deploy a simple container called whoami. This container returns OS and HTTP request information To deploy this container we can use a configuration file like this:
kind: Deployment
apiVersion: extensions/v1beta1
metadata:
  name: whoami
  namespace: default
  labels:
    app: containous
    name: whoami
spec:
  replicas: 1
  selector:
    matchLabels:
      app: containous
      task: whoami
  template:
    metadata:
      labels:
        app: containous
        task: whoami
    spec:
      containers:
        - name: containouswhoami
          image: containous/whoami
          ports:
            - containerPort: 80

---
apiVersion: v1
kind: Service
metadata:
  name: whoami
  namespace: default

spec:
  ports:
    - name: http
      port: 80
  selector:
    app: containous
    task: whoami
---
apiVersion: traefik.containo.us/v1alpha1
kind: IngressRoute
metadata:
  name: whoami-route
  namespace: default

spec:
  entryPoints:
    - web
    - websecure

  routes:
    - match: PathPrefix(`/whoami`)
      kind: Rule
      services:
        - name: whoami
          port: 80
  tls:
    certResolver: le
    domains:
      - main: YOURDOMAIN.com
        sans:
          - "*.YOURDOMAIN.com"
Important things to note about this configuration:
- We use a special type of resource called IngressRoute which is only available thanks to the Traefik CRD we applied earlier.
- The routes attribute defines when traffic should be routed to our container, you can learn more about routing here. We define a simple route that will respond to a path of /whoami
- The tls attribute defines which certificate resolver we would like to use and the domains for which this request will be valid for. You will need to update this domain value to the one you own.
After applying the configuration you should be able to navigate to https://YOURDOMAIN.com/whoami and see something like this:
Conclusion
We now have a fully configured Traefik instance configured with Let’s Encrypt for automatic certificate renewal and a sample container to test your setup. You should now be able to leverage this setup to run any docker container within your AKS cluster and take advantage of the advanced features of Traefik.

