Puppeteer in a continuous integration environment
Learn how to setup a continuous integration pipeline that will run your Puppeteer tests.

Browser-testing is a great way to check that your website is performing optimally for your users and Puppeteer is a great browser testing framework that you can use for that.
So, now you've created some Puppeteer tests and they work great but in order to really monitor your website you need to run those tests in a continuous testing environment. You can choose one of two ways to run your tests:
- On a schedule: Your test is run at defined intervals. This is great for verifying existing functionality and ensuring that you discover errors before your users do.
- On a code change: Your test is run when you code change. This works really well as a regression test to ensure that any code changes have not broken existing functionality and to test any new functionality.
Today I want to focus on how you can create a setup that runs your Puppeteer tests when code changes are made by making use of a continuous integration environment.
Puppeteer in a Continuous Integration (CI) pipeline
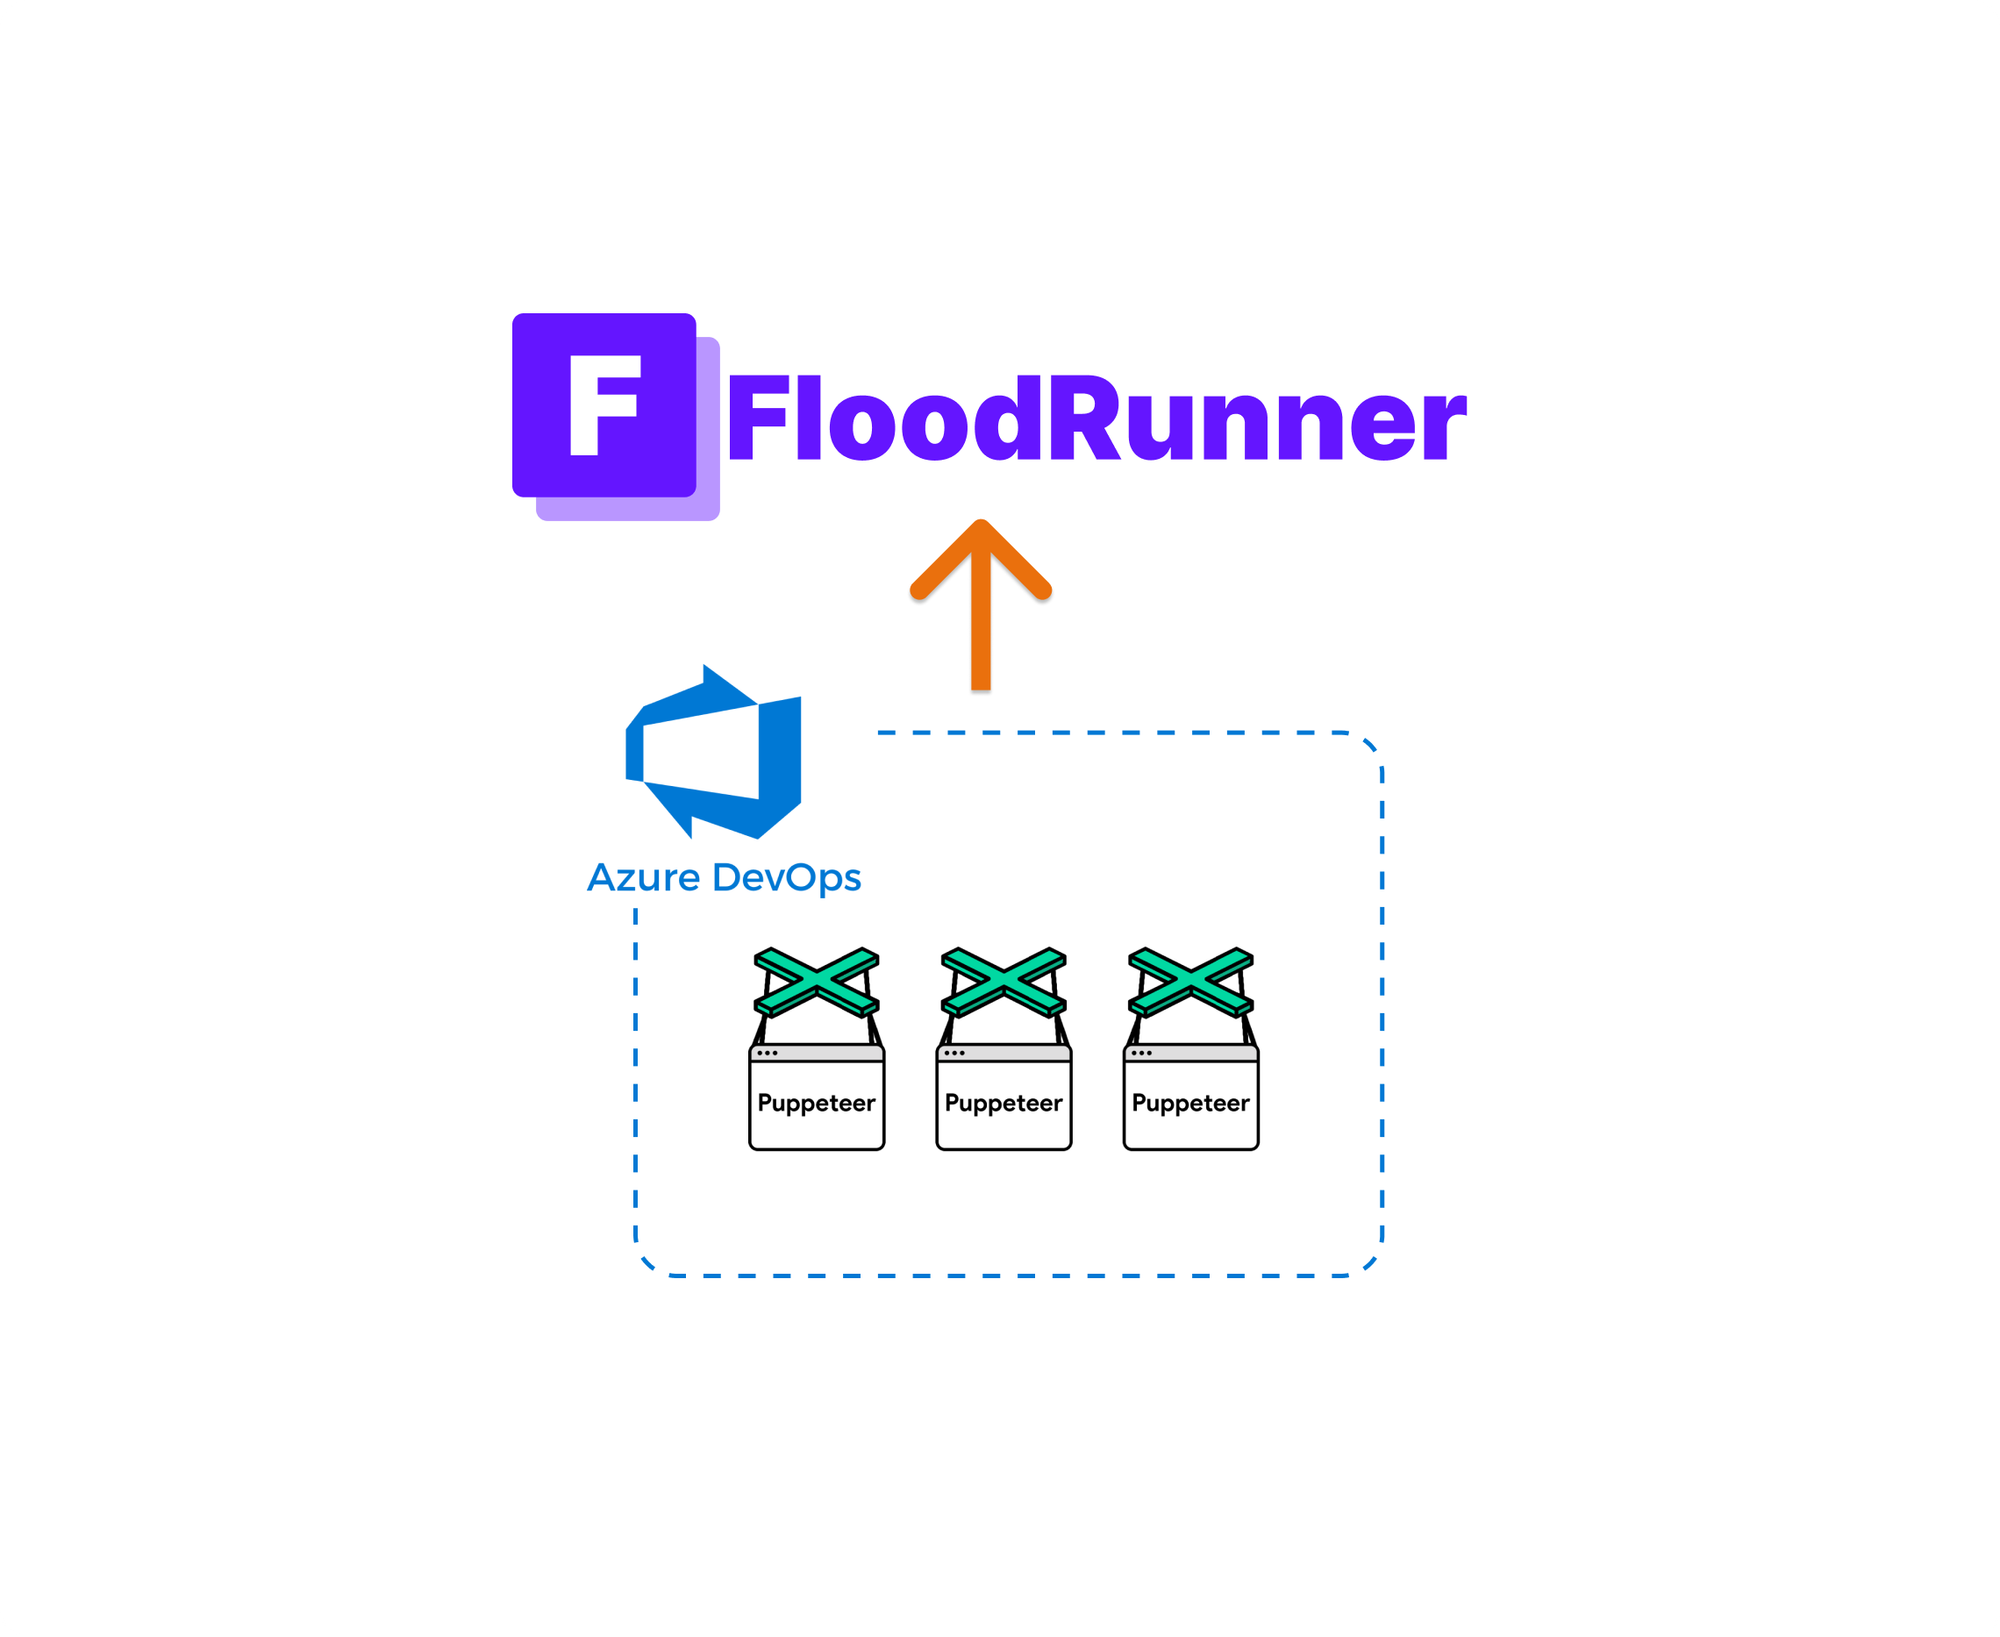
Setting up infrastructure for running your Puppeteer scripts is quite a troublesome affair, which is why I created FloodRunner. FloodRunner is an opensource platform (read more here) with an awesome free plan so we'll be using it for this implementation.
For setting up continous testing we can use any CI platform - I'll be using Azure DevOps to demonstrate but the same principles apply to any CI platform.
Setting up Puppeteer script
First we have to create our Puppeteer test script. I've created a simple test script that navigates to FloodRunner's landing page, takes a screenshot and outputs some logs as it runs.
FloodRunner handles your test in a special way (you can learn more about creating Puppeteer tests on FloodRunner here).
/**
 * @name FloodRunner landing page
 *
 * @desc Navigates to FloodRunner (floodrunner.dev) landing page and takes a screenshot
 */

const page = await browser.newPage();
await page.setViewport({
  width: 1280,
  height: 800,
});
console.log("Navigating to FloodRunner...");
await page.goto("https://www.floodrunner.dev/");
console.log("Taking landing page screenshot...");
await page.screenshot({
  path: path.join(screenshotPath, "landingpage.png"),
  fullPage: true,
});
console.log("Completed Puppeteer script...");
Creating an API Access Token for FloodRunner
Now that we have created our test we need to create an API access token so that our CI environment can interact with FloodRunner.
To do that, we log into FloodRunner by navigating to https://app.floodrunner.dev and then click on Settings -> Personal access tokens and create an access token.
NB. Ensure that you save your access token as it will only be shown once for security reasons.

Creating a PowerShell script to call FloodRunner API
Now that we have our API access token we can move on to creating a simple script that will upload our test to FloodRunner and execute it. We will be using this script as a step in our CI pipeline.
I've created a simple PowerShell script that takes in the path to our Puppeteer test script and our API access token. It then invokes FloodRunner's API endpoint to run the test and returns the results of the test execution.
<###
Invoke FloodRunner's Rest API for running Puppeteer test
###>

Param
(
    [Parameter(Mandatory = $true)]
    [string] $apiAccessToken,
    [Parameter(Mandatory = $true)]
    [string] $FilePath,
    [Parameter(Mandatory = $false)]
    [string] $floodRunnerAPIUrl = "https://floodrunner-api.azurewebsites.net/floodtest/runtest"
)

## Create API request
$headers = @{
    'x-api-key' = $apiAccessToken
}

$form = @{
    name        = "Puppeteer Azure DevOps"
    interval    = 1 #ignored since this is a on-demand run
    type        = "puppeteer"
    description = "Puppeteer test run using the FloodRunner API"
    testFile    = Get-Item -Path (Join-Path -Path $PSScriptRoot -ChildPath $FilePath)
}

$response = Invoke-WebRequest -Headers $headers -Uri $floodRunnerAPIUrl -Method 'POST' -Form $form
$responseContent = ConvertFrom-Json $([String]::new($response.Content))

#Output response content
$responseContent

$statusCode = $response.StatusCode

# Check that the Puppeteer script was executed
if ($statusCode -ne 201) {
    Write-Error "Failed to execute Puppeteer script";
}

# Check that the Puppeteer script passed
if (!$responseContent.isSuccessful) {
    Write-Error "Puppeteer script failed";
}
Create CI pipeline in Azure DevOps
The final step is to use the PowerShell script we've created in our CI pipeline. The pipeline just needs one task that will call the script with the required parameters.
A basic CI pipeline could look like the one shown below. We pass in the path to our Puppeteer test and our API access token.
# Azure pipeline for running Puppeteer script using the FloodRunner API

trigger:
- main

pool:
  vmImage: 'ubuntu-latest'

steps:
  - task: PowerShell@2
    displayName: "Run Puppeteer script"
    inputs:
      filePath: 'floodrunner_upload.ps1'
      arguments: '-apiAccessToken $(ApiAccessToken) -FilePath "floodrunner_landing_page.ts"'
      failOnStderr: true
      pwsh: true
Since our API access token is supposed to be kept secret, we add our token as a pipeline variable and mark it as secret.
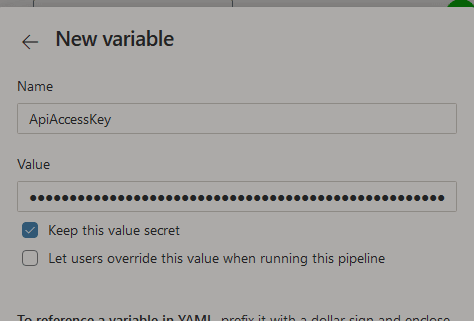
ApiAccessKey as a pipeline variableCI pipeline results
Now that your CI environment is setup, the next code change you push will trigger your Puppeteer tests. The results from these tests can be used as a quality gate to ensure that your changes haven't broken any functionality.
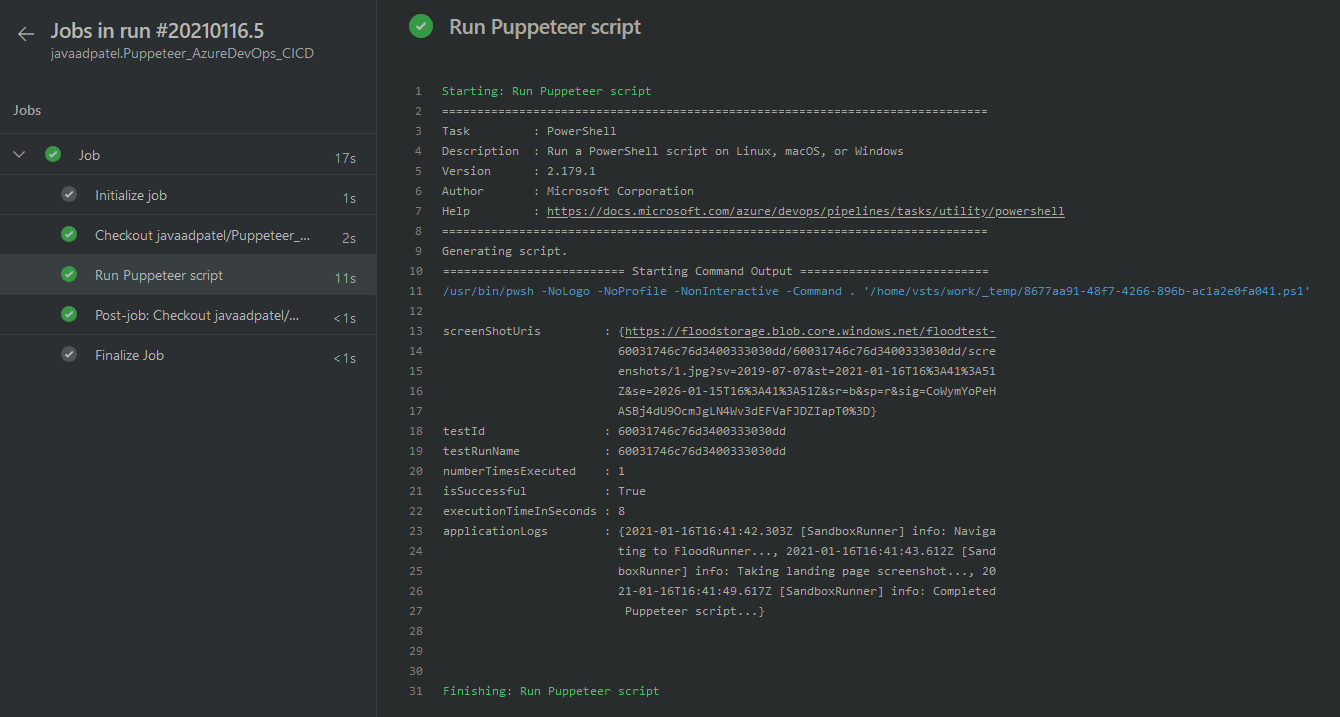
The script will output any results returned from FloodRunner, which includes:
- Any logging you've put in your script
- Links to screenshots you've taken
- The time it took to execute your test
- Status of your test (passing/failing)
That's all there is to it. Setting up Puppeteer to run in a CI environment is as simple as that. Now just make sure your code changes aren't the ones to break the pipeline 😅.